A Deeper Dive Into Decandling
It’s Japanese Black Pine decandling time again. Or it might be, depending on where you are. It is where I am, the Pacific Northwest, where we’re finishing up decandling this week.
The decandling date will differ according to where you live, which is determined by latitude. Here in Portland, Oregon we cut end of May / beginning of June, while in Los Angeles it would be closer to July 4th. There’s a longer growing season down there, and as decandling “resets the spring,” so to speak, you want to time your cuts accordingly, as that will determine the regrowth needle length.
Decandling assumes good sun and enough warmth. In shade, or regions with cool summers, Black Pines are often better grown as single-flush pines. They should be fertilized well in the spring and in the fall to do this intense shoot removal, with a short break for 4-6 weeks after decandling in summer, to get short shoots. After that, begin fertilizing again for the needles.
A lot has been written about Black Pine decandling—and I highly recommend the many pine posts on Jonas Dupuich’s Bonsai Tonight blog for more.
In this post, after an overview of a common technique, we dive into a couple puzzling situations you may encounter on a developed Black Pine.
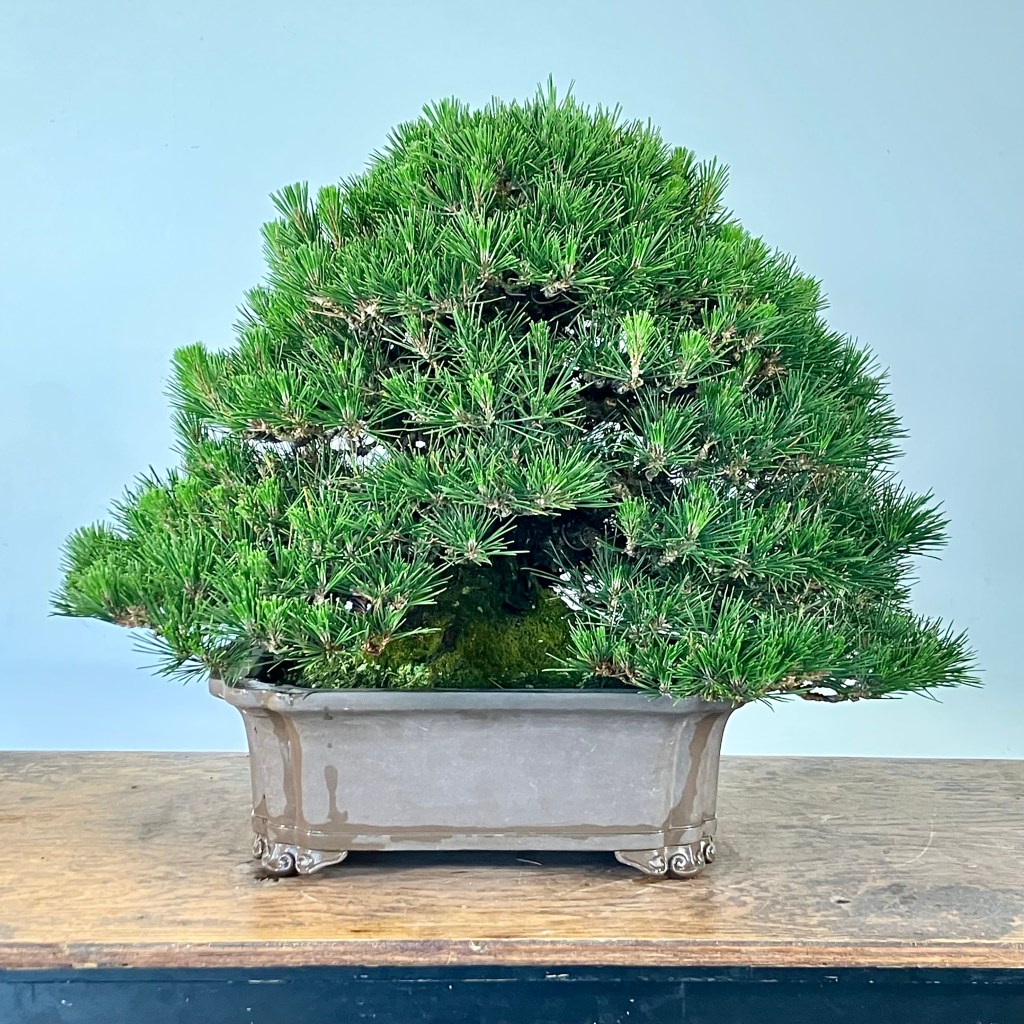
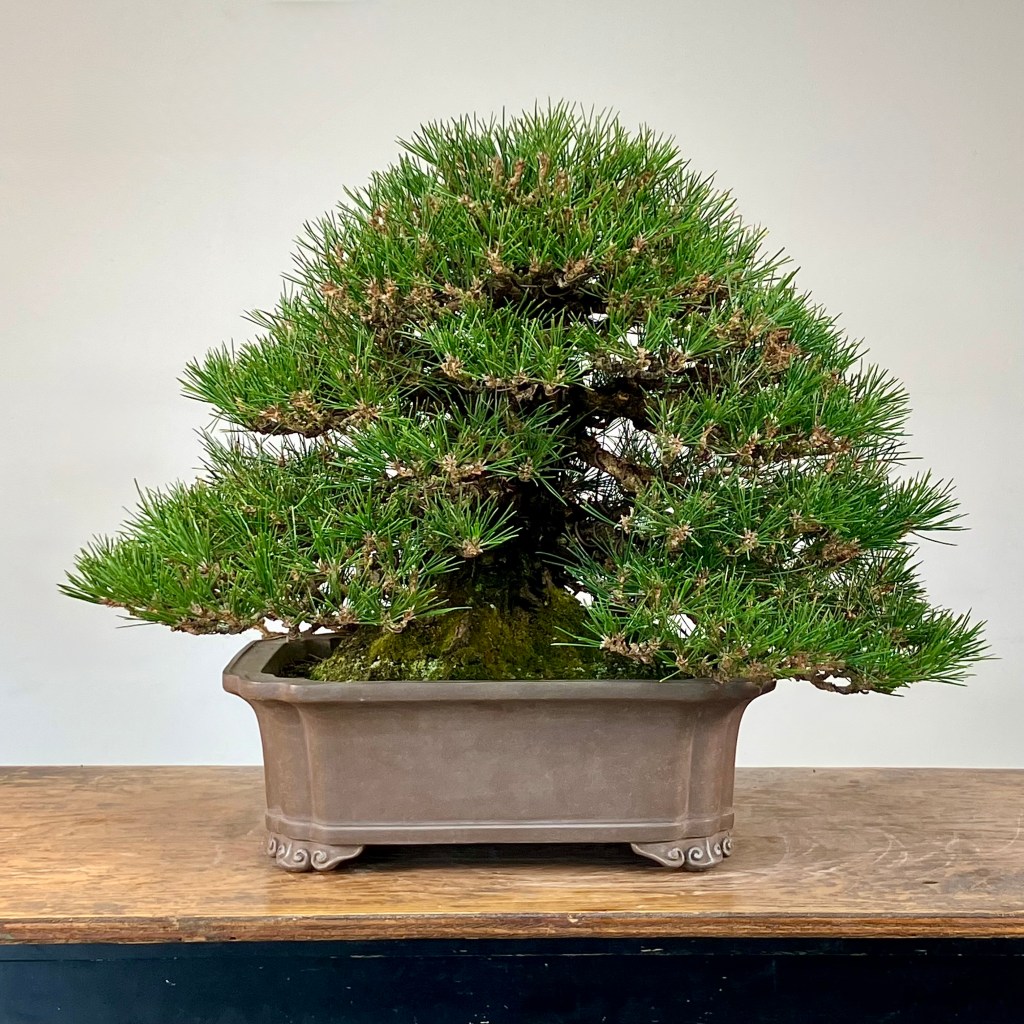
Here is our Japanese Black Pine, Pinus thunbergii, before decandling. It’s an older pine, with a lot of density. Today we’ll talk about how to manage that density.
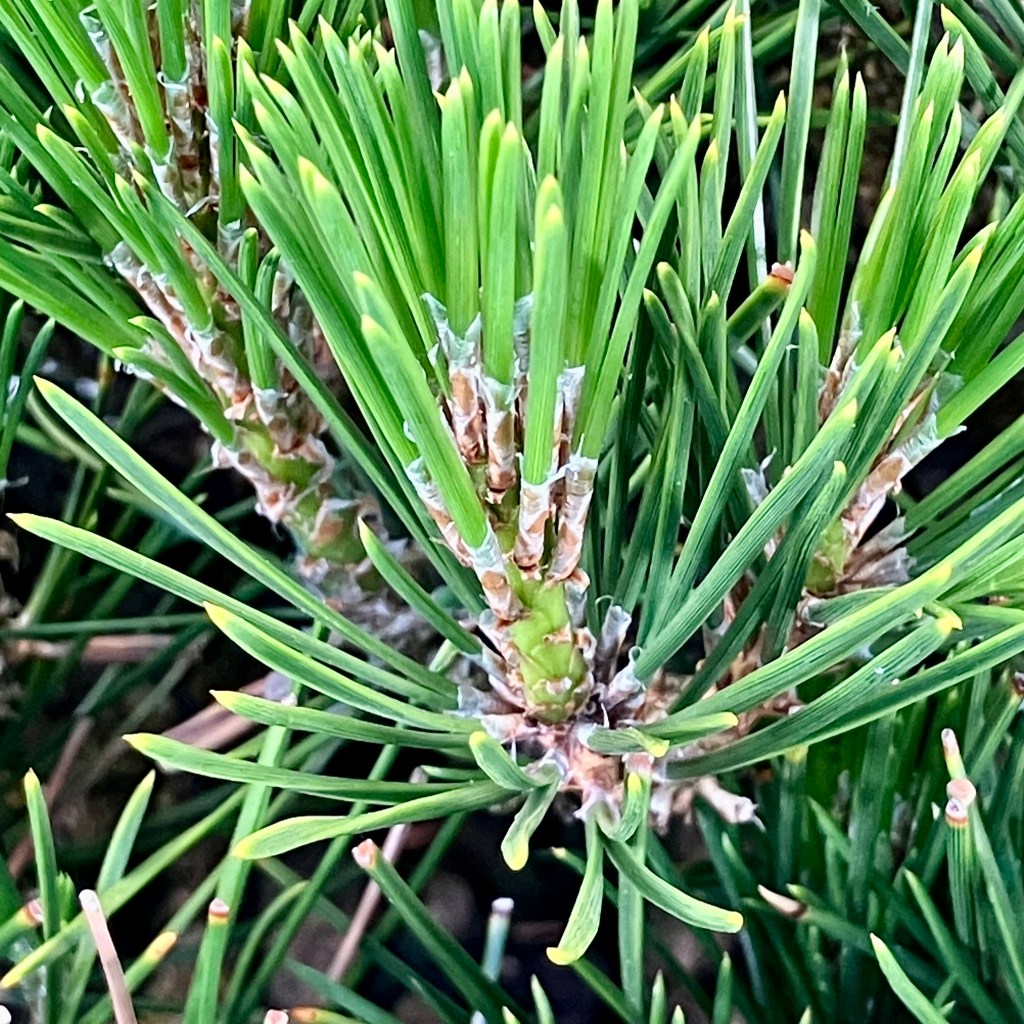
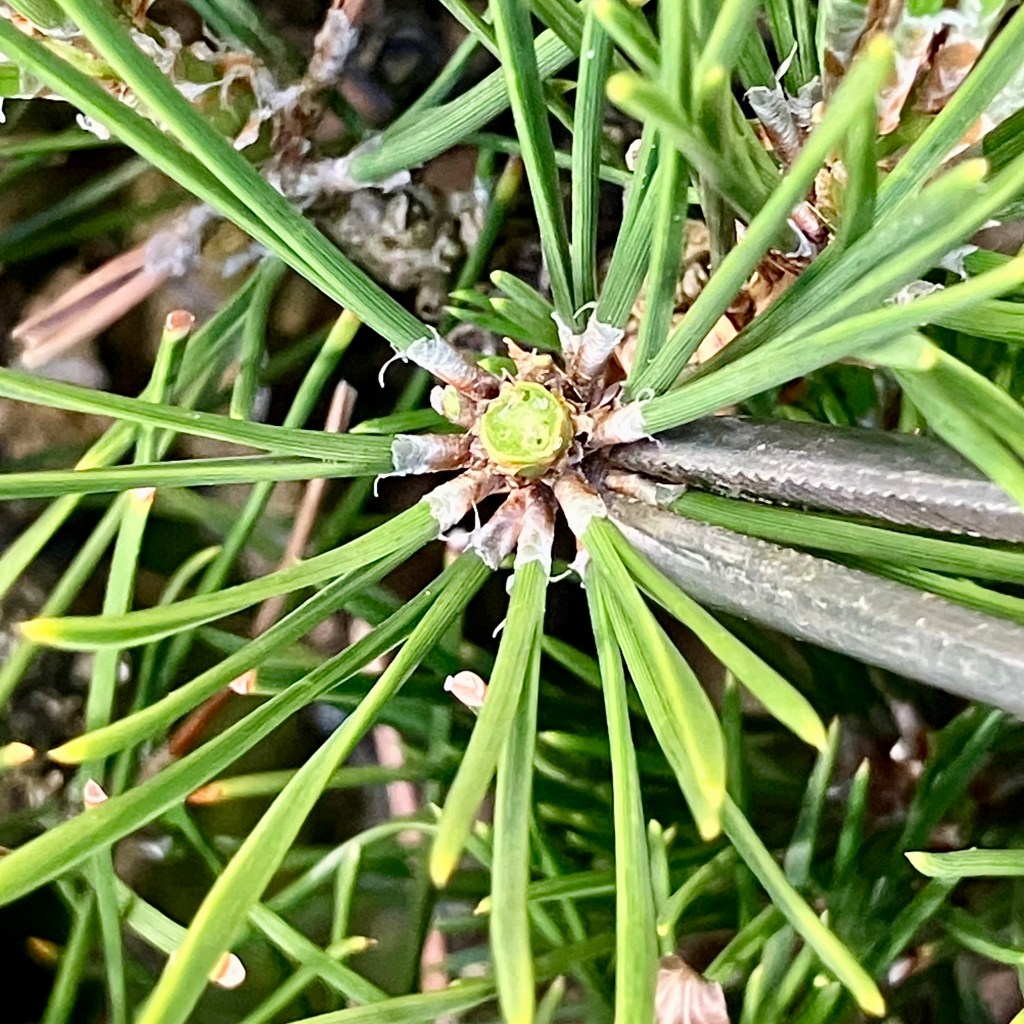
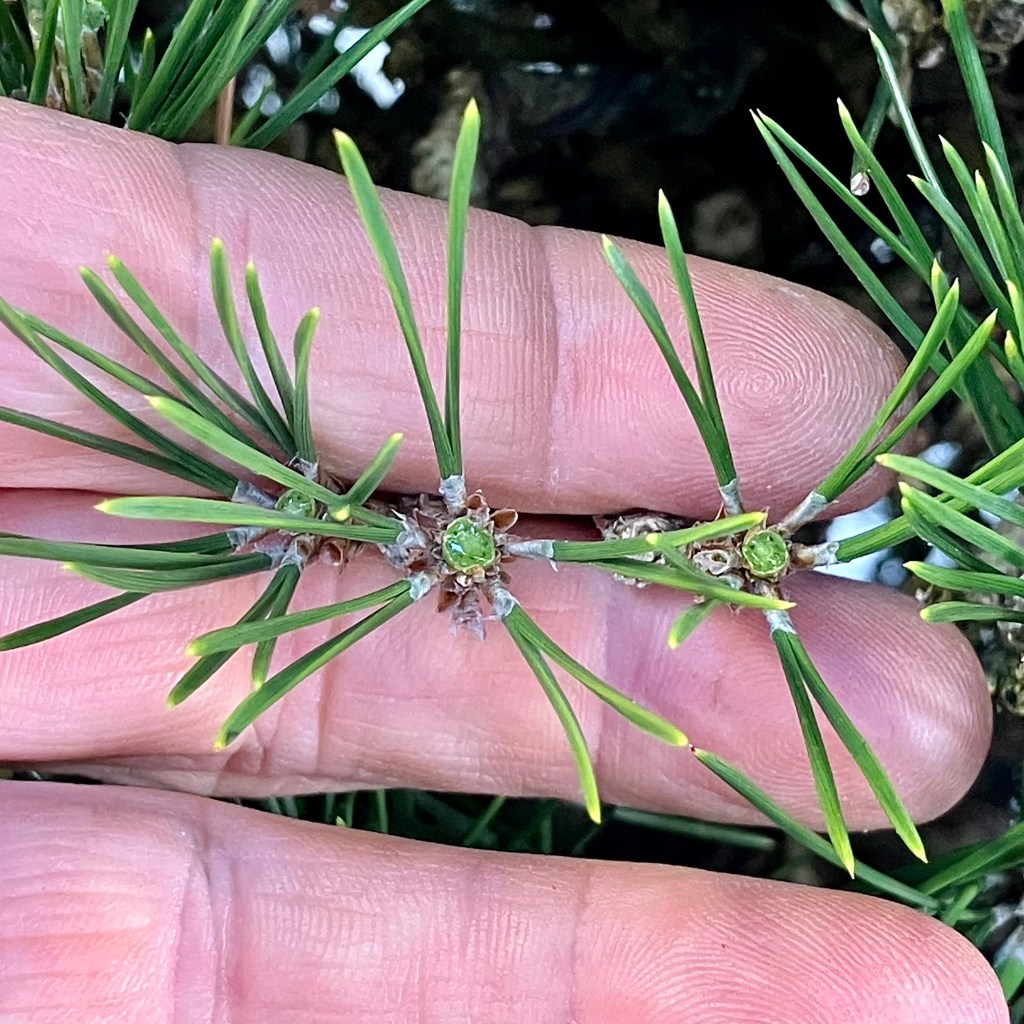
For an overview of a common decandling technique, identify those candles large enough to cut off. This one is of medium strength, and may be cut. Smaller ones may also be cut, but leave very small ones.
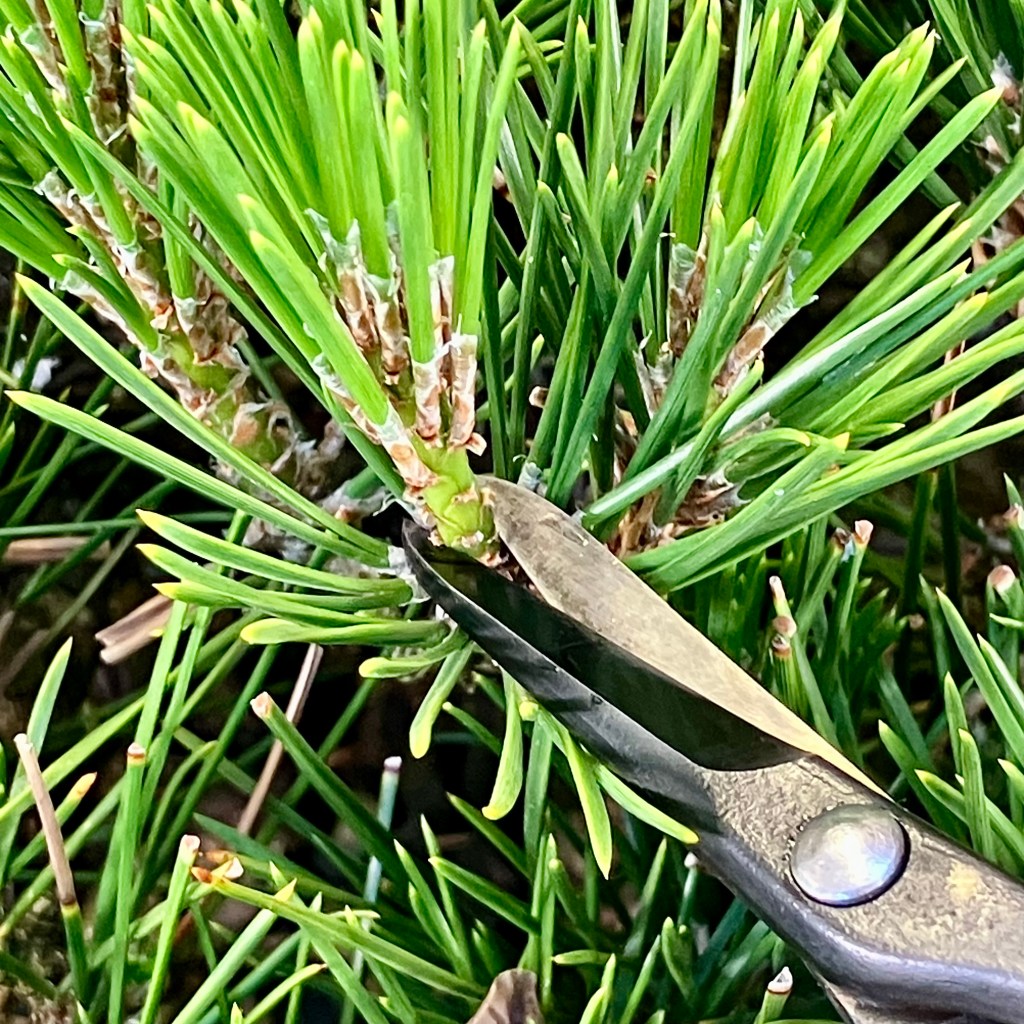
In decandling the whole shoot is cut off (do not do this on single flush pines, like a Scots Pine or Japanese White Pine). Then some needles are pulled off.
We leave a stub, if the candle is strong enough, which serves as an energy drain on the shoot, making smaller regrowth. With strong candles, leave a longer stub, and weaker candles a shorter one.
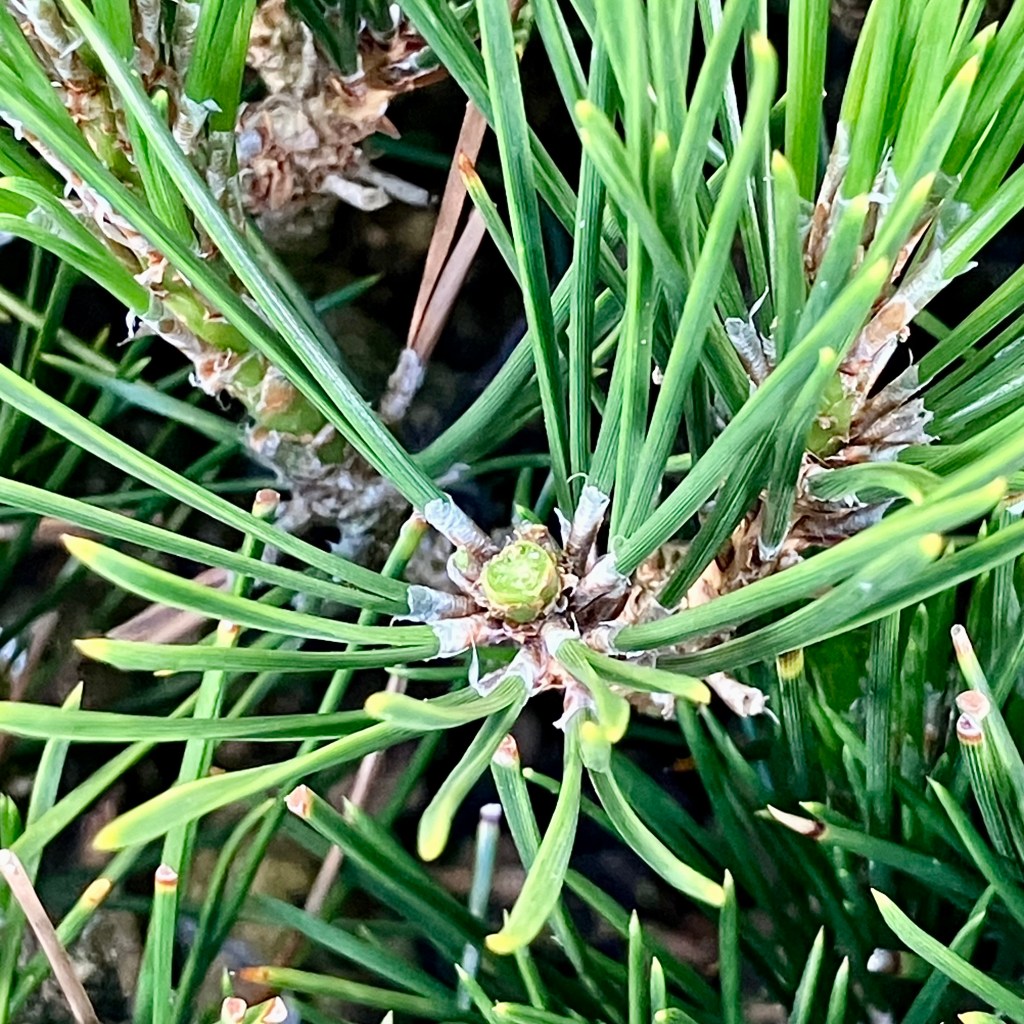
The candle cut off. A small stub remains.
Next, needles are pulled. Start with those further down the shoot, leaving those near the cut site.
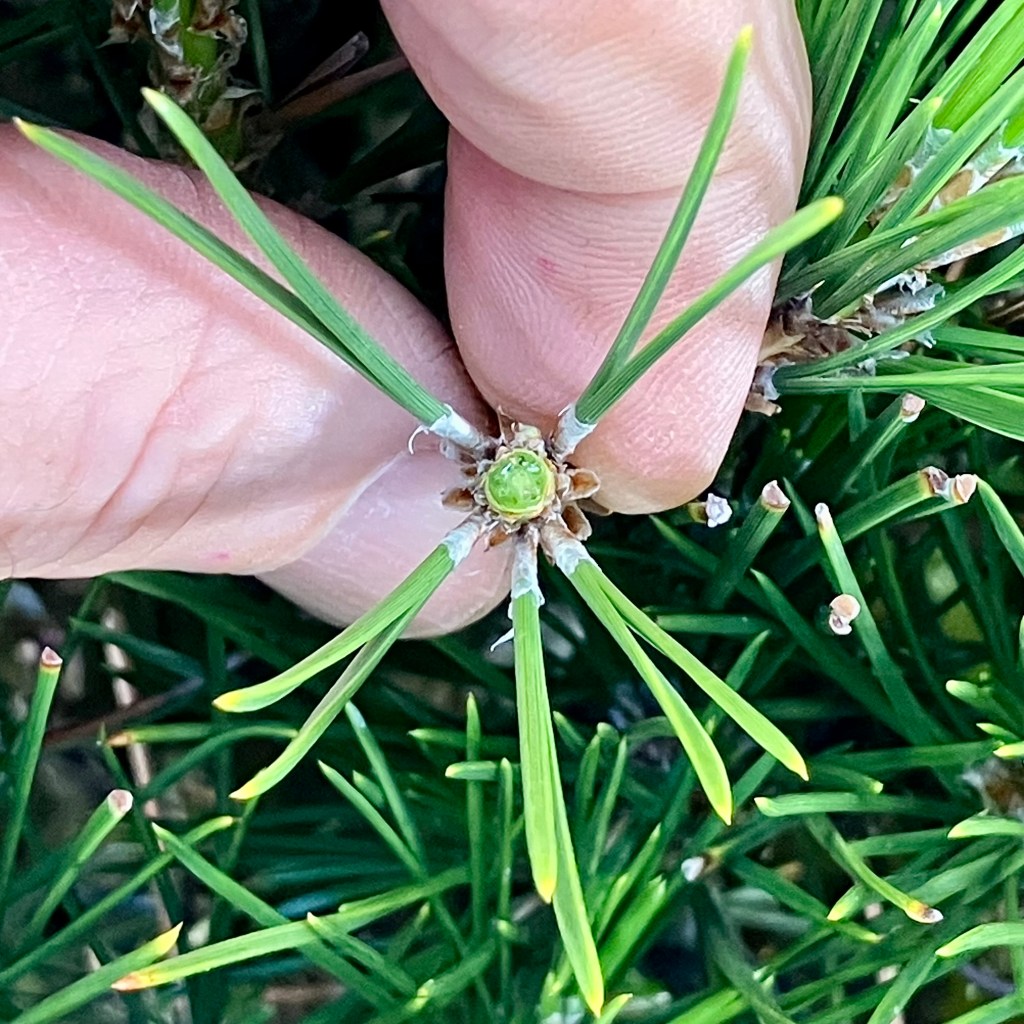
Try to leave a star pattern. This shoot is at the top of the tree, and this is an average number of needles left there, 5 pairs. On the middle branches you might leave 6 pairs of needles. On the bottom, 7 pairs. This needle variance is a typical method of combating the apical dominance of Japanese Black Pine.
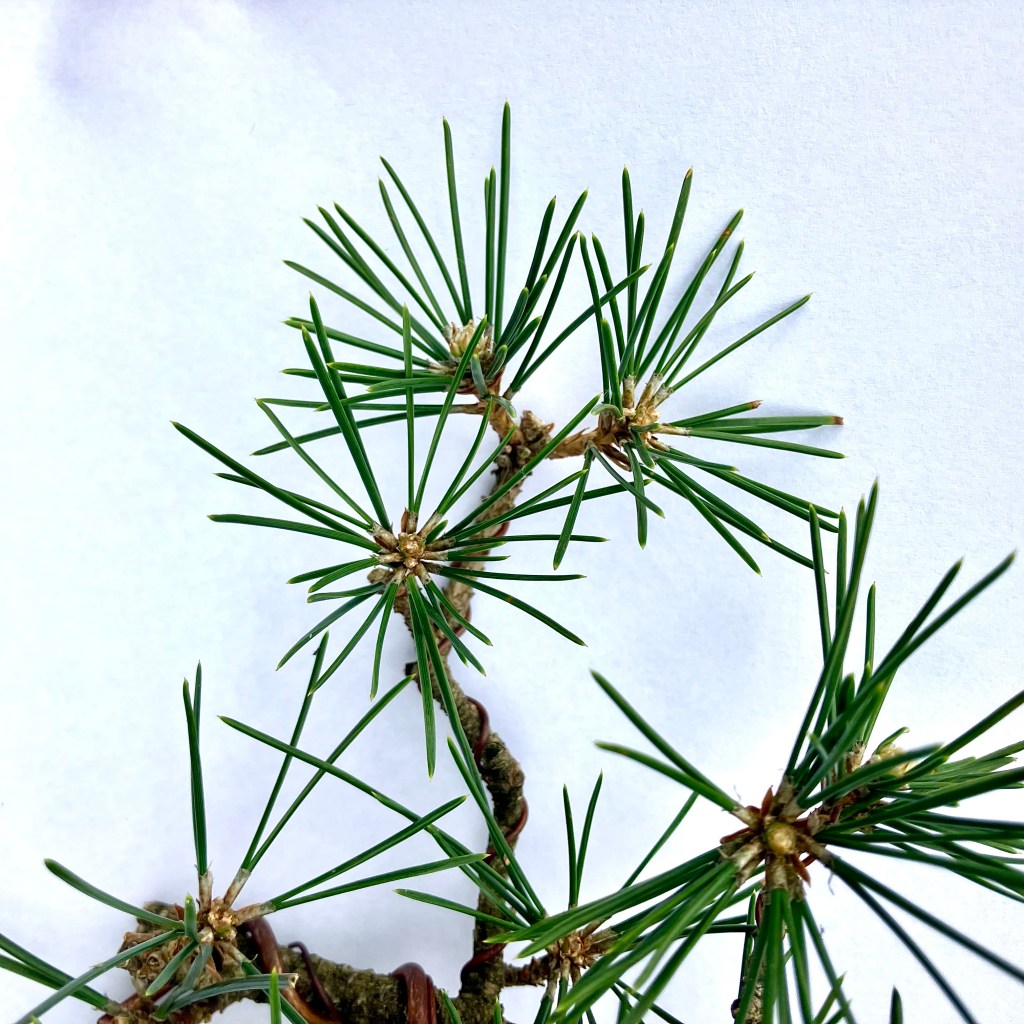
If you have a loose plant, like this one, with only a few branches and shoots, follow the above set of photos for the normal technique. But don’t pull off so many needles. Maybe leave 10 pairs.
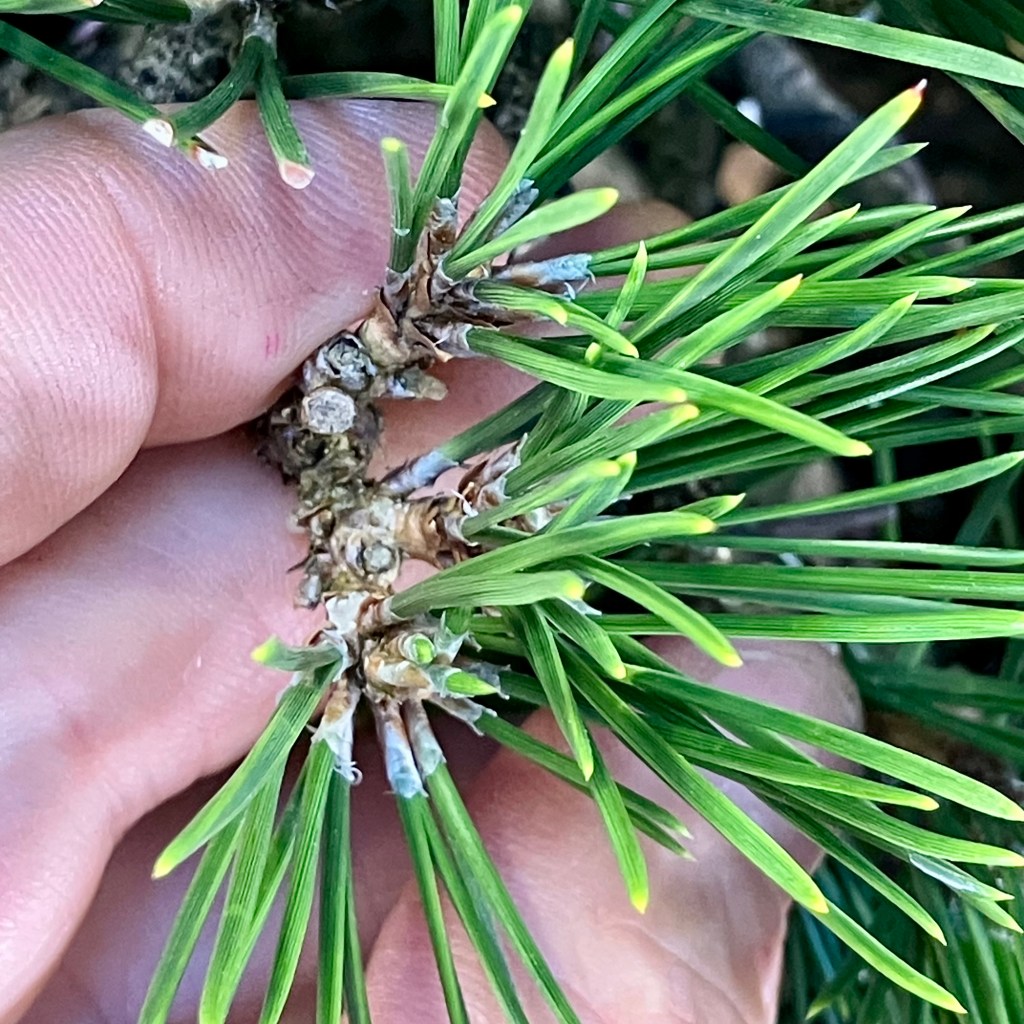
Let’s get deeper in the weeds with the denser pine. For here it gets tricky. What about adjacent shoots? Here there are three small shoots. None are strong enough to decandle. Only one, the lower one, is even making a candle this year. To strengthen this area, and to keep the density the same as the rest of the tree, something has to go.
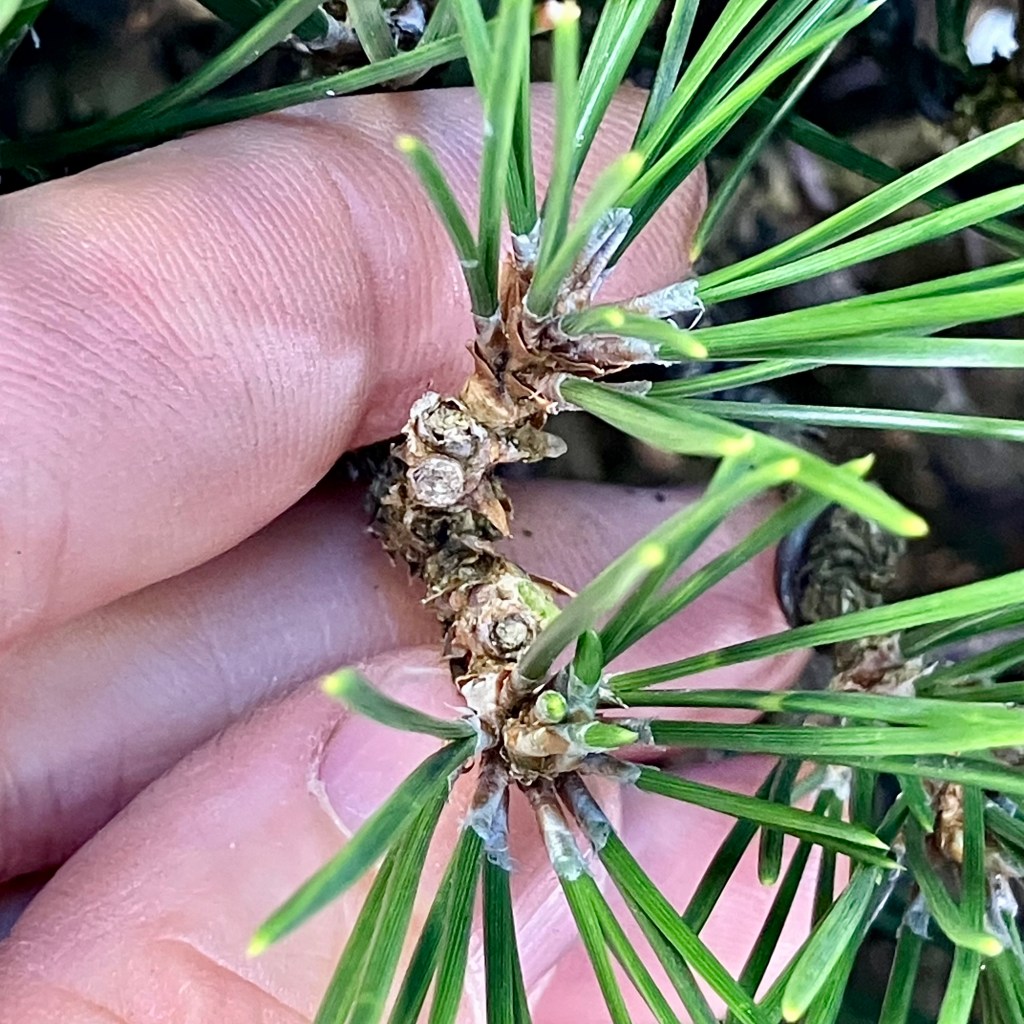
The middle shoot is cut off, leaving more energy and space for the remaining two. To strengthen the shoots no needles are pulled.
This is one of the harder things to put into practice: though we want ramification, on a mature tree, you end up cutting off shoots in order to make room and to have enough energy for the next set.
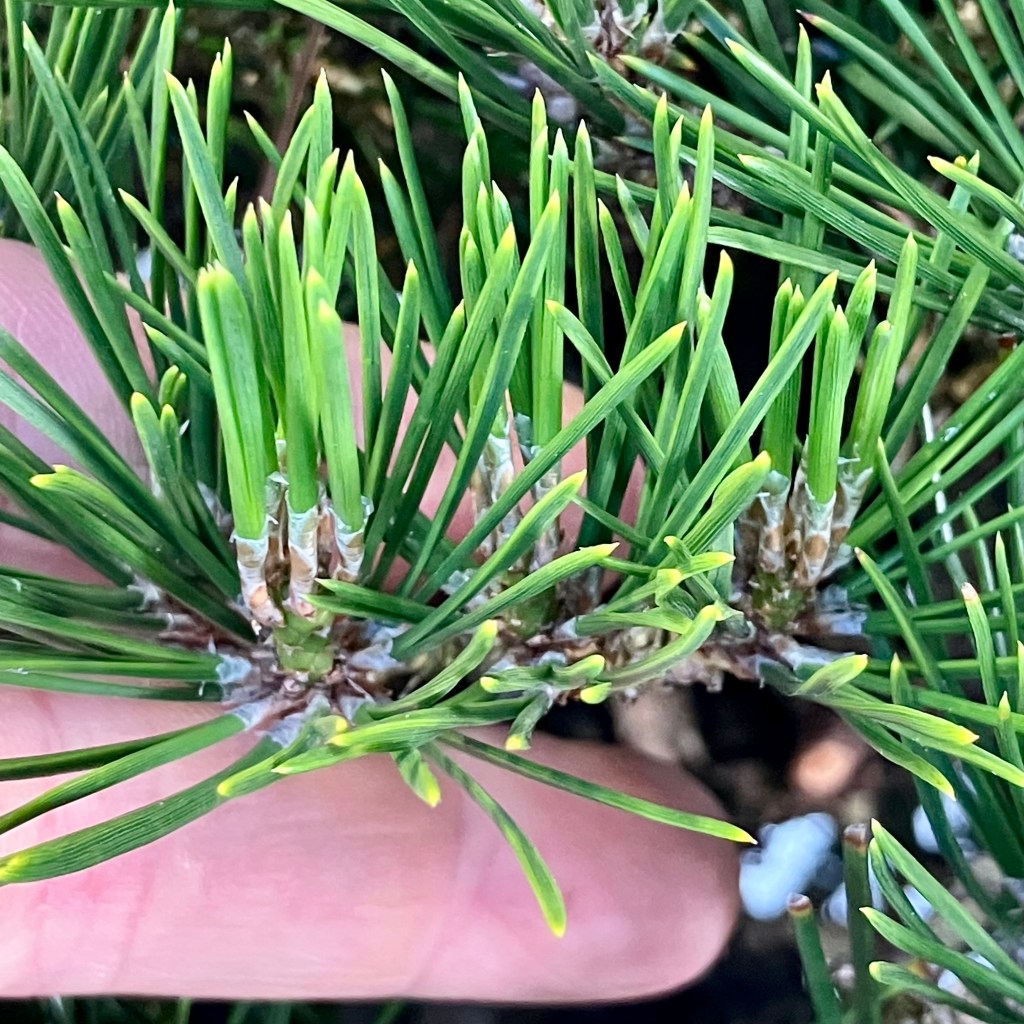
Another complicated area. Four shoots. They are all strong enough to decandle, but it’s too busy. There’s no space for regrowth. Also, these candles are at the lower limit of the size you can decandle and expect regrowth, and cutting all of them often results in one or two not growing any summer candle at all, or all getting weaker.
Space constraints + energy constraints = something gets trimmed off.
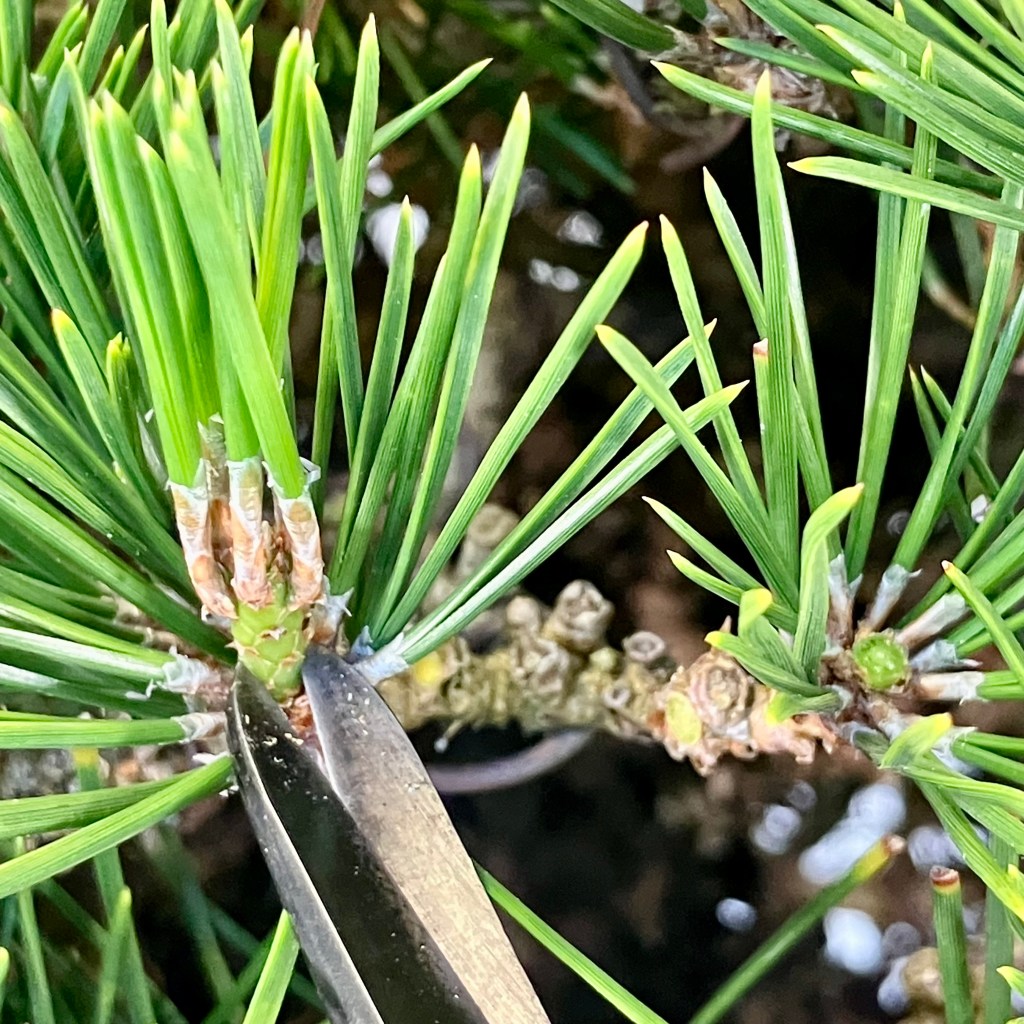
The middle shoot was cut off to clear some space. The candle on the right was cut. Now another candle is being cut.
Some prefer to pull needles first, though I find it easier to find which needles to pull after the candle is gone.
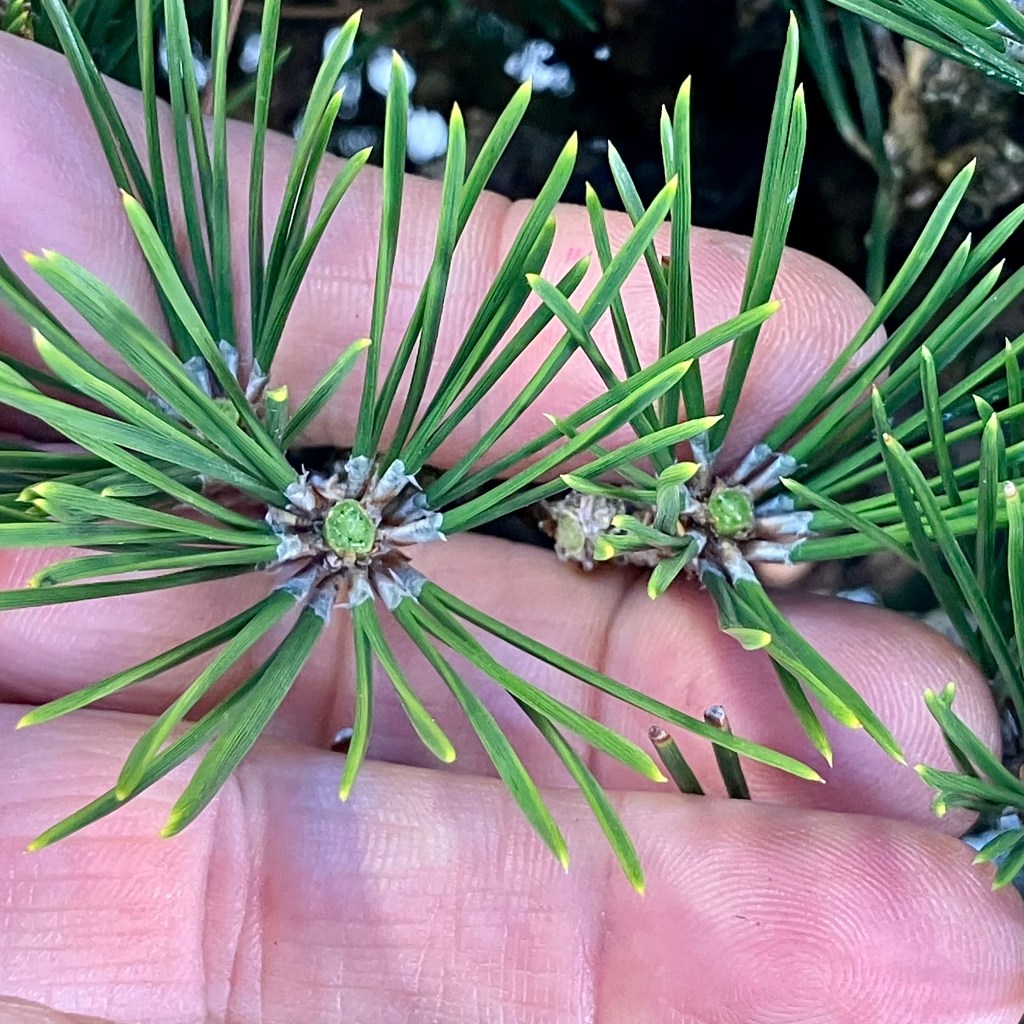
Almost done with this set of shoots.
Same set of shoots after needle pulling. I left a few more pairs of needles on the far left shoot as it was weaker.
It’s simplified, yes? On a mature tree you build ramification slowly, if at all.
The pine after decandling and needle pulling.
To put all this another way: A potted Black Pine can only maintain a certain number of shoots with the energy to be decandled, so there is no infinite ramification potential.
It’s a bit bittersweet: we do a lot of work and then cut off half of what we did the season before.
But not to end this post on a low note. For we’ve achieved a lot of things by decandling. We make ramification. Short needles. And we strengthen weaker interior shoots, which would otherwise die.
Yet an often missed goal is short shoots. Decandling gives us intense compaction on this long-needled pine, in whatever needle length we want. Depending on when we cut the candle.
But one last thought there—too short a needle can be a liability on a Black Pine. It can weaken the tree. The above tree is 18” high. The needles are 1.5” long, which is the shortest length for a tree of this size to keep it happy. If they were less than an inch (which might be OK on a shohin) I’d cut the candles about 10 days earlier to get more needle length.
June 2026 Bulletin Board:
- Alert! Mr. Shinji Suzuki’s presentation on July 19th, 2026 at the Portland Art Museum is close to selling out. It’s a 400-seat hall, and is shaping up to be a smashing event. If you want to join us, here’s some deets: The Way of Bonsai
Leave a Reply