A Simple Guide To Directional Pruning
While conifers are often wired for minute adjustment of twigs, the approach for deciduous trees is often with scissors.
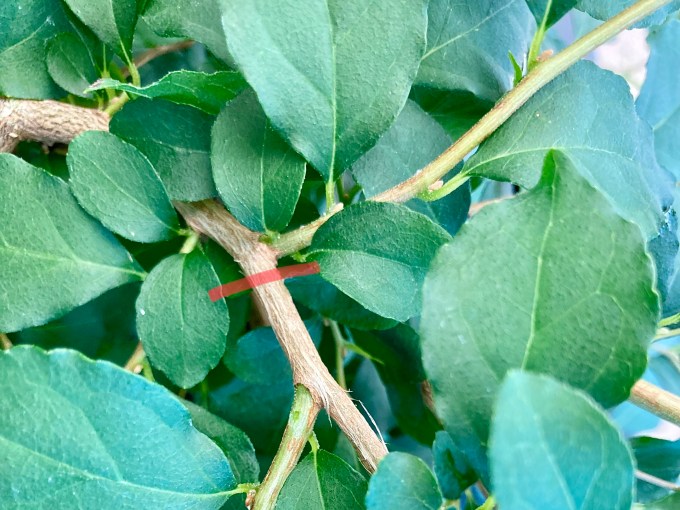
This is a Stewartia. First cut suggested by red line.
In directional pruning we cut to a shoot going in a direction we want. A way to preempt this is to cut to a bud—assuming we can see it.
If your deciduous tree has a very small bud, look for the leaf. At the base of the petiole—the leaf stem that attaches to the shoot—there is a bud.
Make your cuts about 1/8” or 1/4” ahead of the bud pointing in the direction you want the next growth to go.
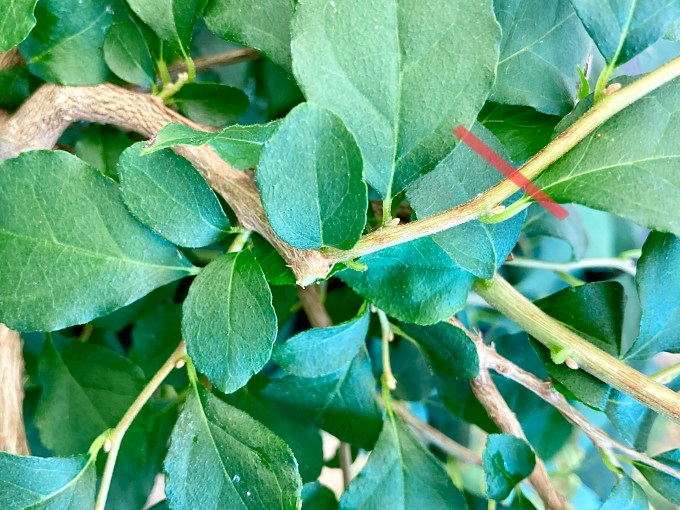
Second suggested cut.
We’ve just created movement with two cuts. Actually we’ve just set up this branch for an S-curve (which if you’ve read Bonsai Heresy, you know how delighted I am by those). This back and forth movement is predictable, and, when possible, avoiding it can create more natural branch movement.
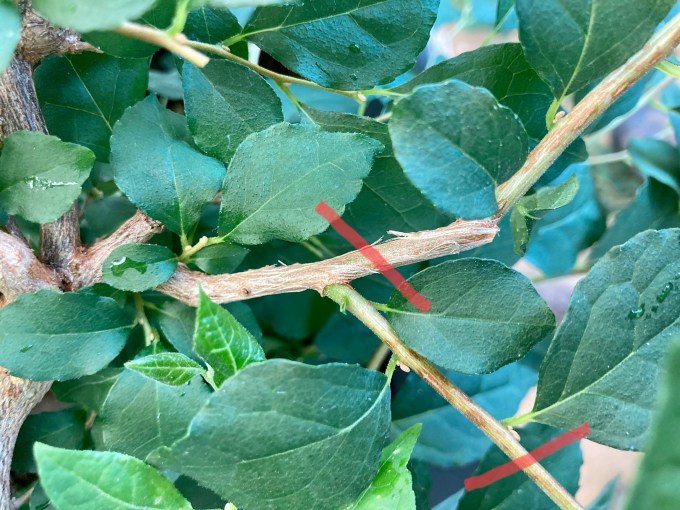
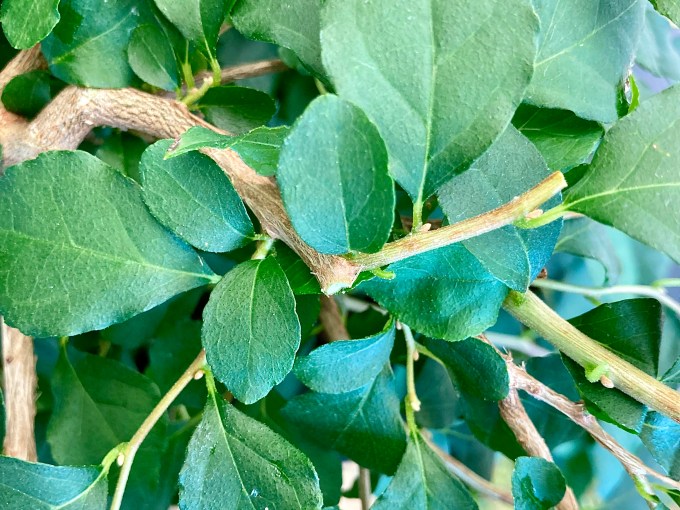
Another example. Two cuts.
And we have another obvious zigzag. Another option is to make a shorter cut. The small leaf at the beginning of the shoot from will also have a bud, giving an interesting jag in the branch.
Some good species for this simple technique are Maple, Styrax, Chojubai, and Elm. Your tree will develop slower than if you wire parts of it, but it will have the advantage of natural movement and no wire scars.
If you grow your tree too hard it may limit the elegance of this technique, for a chopsticky look may result from long, stiff-looking internodes. Many directional pruning advocates wire the trunk and initial branches, and only then take up their scissors once the tree is growing at a moderate pace.
When to cut? A good time is when the growth hardens off in late spring, and then once more in fall. Two cuts a year.

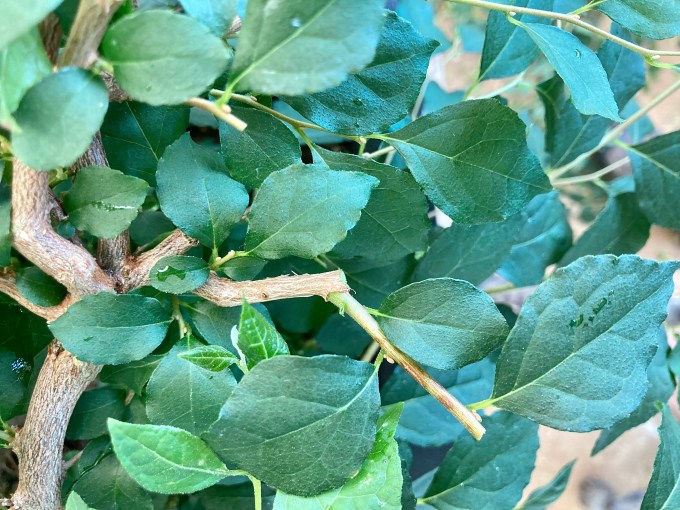
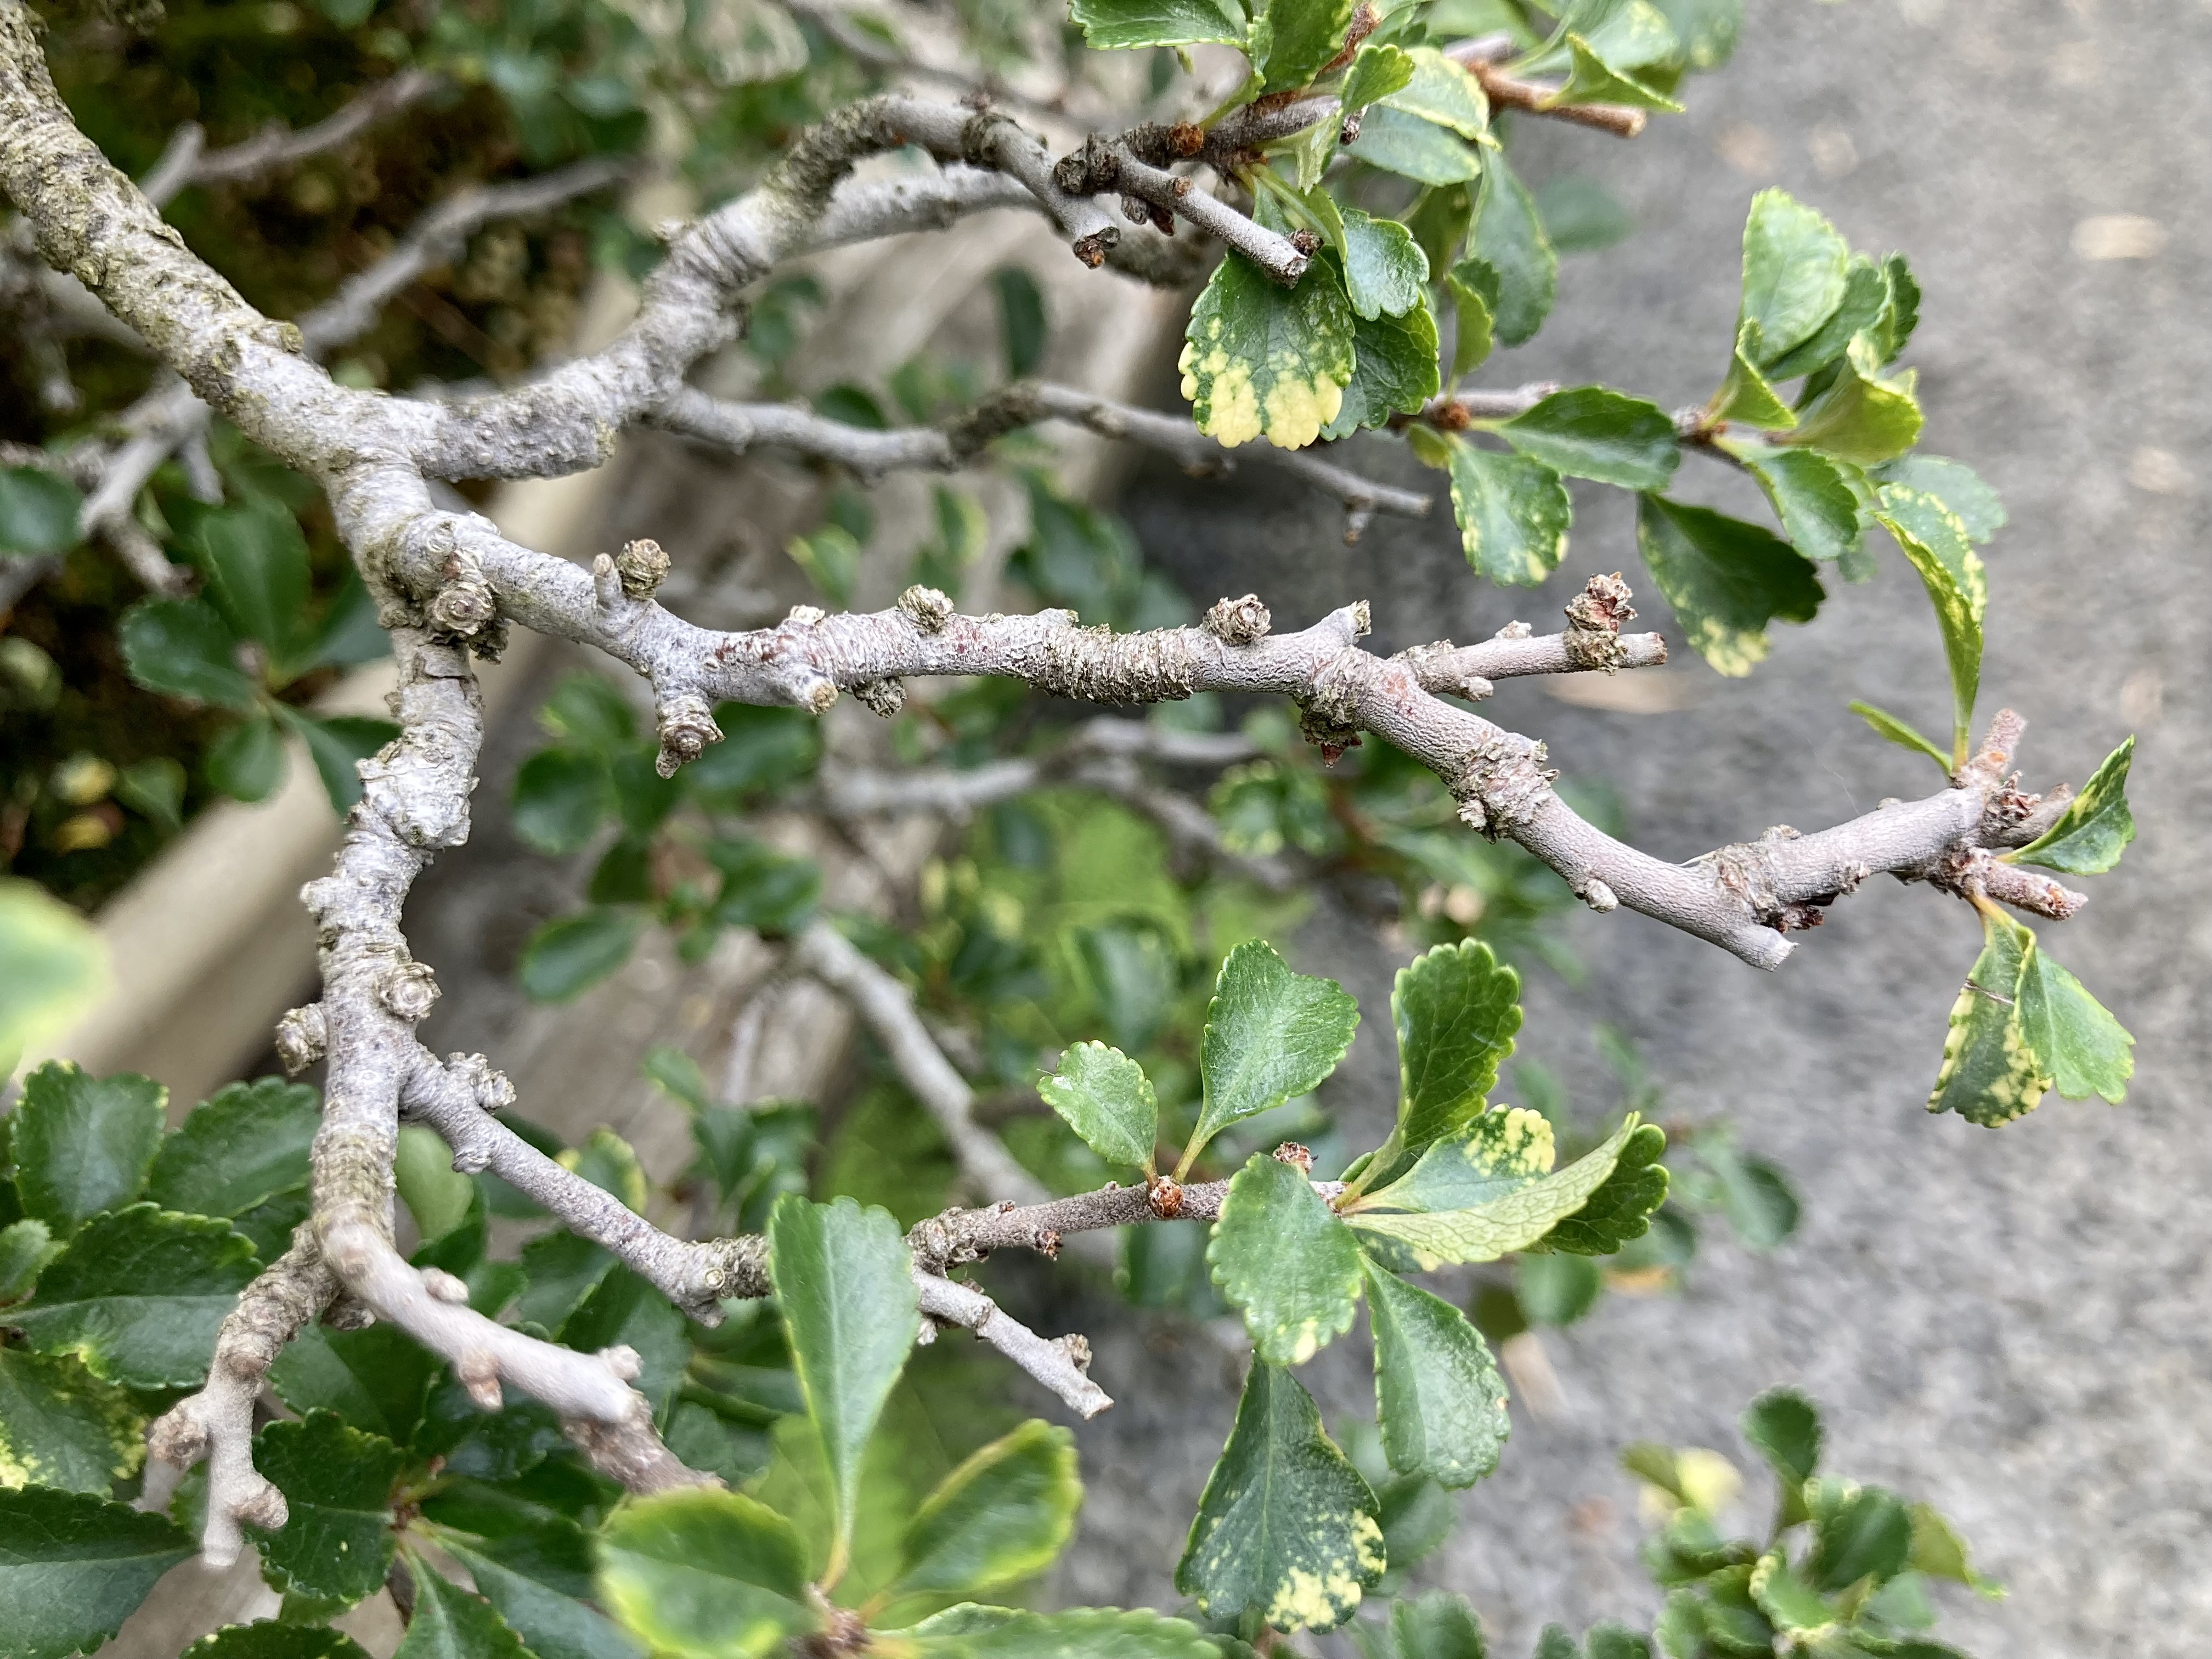
A Stewartia branch created by several years of directional pruning. The branch stubs are often left long for a year, then cut off cleanly (if the transition is to a much smaller shoot).
Chojubai branch, representing several years of directional pruning. No wire has been used. In fact it would be hard to create these micro-movements with wire.
The takeaway here is that with a strong tree and a scissors, you can create movement without wire. It takes a little looking and thinking—what direction you want the branch to grow, and how long you want the segment you’re working on.
6 Comments
Great explanation Michael, thank you!!!
Quick question Michael…in the case of Japanese maple, and other opposite leaf trees, how do you deal with the bud in the pair of leaves that you don’t want activated? Do you remove it? I imagine that you would, and only leave it if you want to expand ramification to 2 branches. Thank you!
I’m Acers, I treat the branch on the undesired direction, after the clip, as the “outside of the elbow” and start pinching the subsequent divisions growth creating a pad.
I like B. Peterson’s reply here.
Generally waiting for a bud you don’t want to extend a bit helps, as a maple is not an easy bud to rub off.
Yes, this method is called “Clip and Grow” that Chinese bonsai artists have been using for a couple thousand years. Thanks for bring this method up.
Yes! Old technique, old as the hills.