Big Juniper Project: ‘The Fish’: Part I
This post is the first in a series of daily photos of a juniper in progress. It’s about as close as I can come to “real time” blogging.
Bobby, my apprentice, and I have been taking our time with this Rocky Mountain Juniper, and enjoying the process of discovering the bonsai within the tree. I collected this tree in the Rockies several years ago. This year it’s showing long shoots, which indicate readiness for styling.
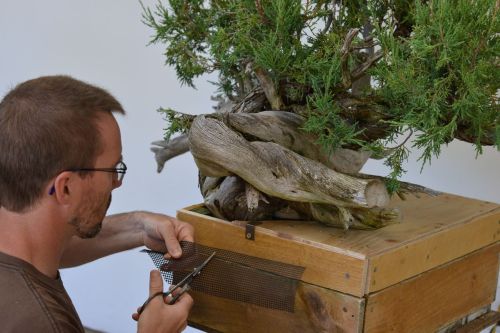
So far we’ve done a few things. We rebuilt the box, for one. The new inclination is about 75 degrees up, which required some rethinking or the soil would have fallen out. We also cleaned up the bark on the tree to distinguish it from the deadwood. And then we took out a lot of really old bark caught between areas of the deadwood jins. Getting rid of that takes quite a while.
At the end of the first day with this juniper I was sitting down studying our work, and shouted to Bobby, who was out watering the bonsai yard, “This tree looks like a fish!” He came in and laughed, seeing the forked tail high in the air and pointed out the various other fins and named them–as a true man of the aquarium would do. Bobby’s background is in public aquaria. (Please understand I mean “The Fish” as a nickname… for only shockingly good bonsai get real names in Japan, the names they are known as throughout the community, and although this is a nice tree, it’s not remotely in that league.)
More photos tomorrow!
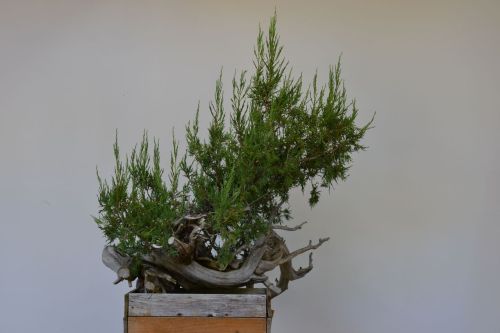
Rocky Mountain Juniper before work

Beginning to rebuild the box so it can sit at a new inclination
Screen for around the trunk so the soil does not fall out
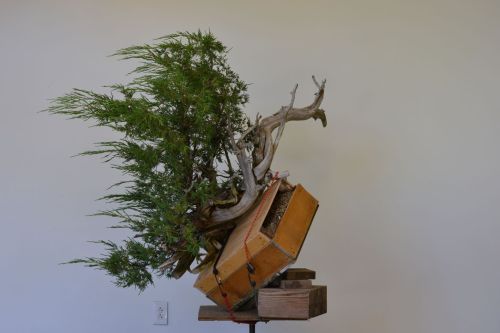
New inclination

Cleaning out the old bark trapped between jins

Bobby cleaning out bark

Doing some sanding removal of dead bark
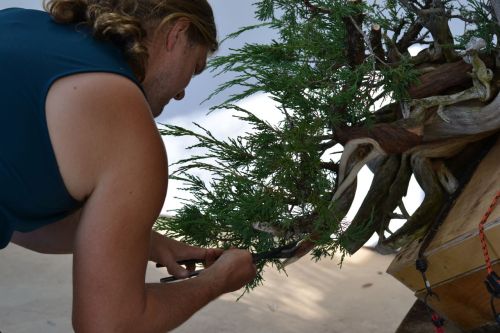
Carving a cut stub
8 Comments
Hi Michael
Great material. Has the foliage been grafted or is that home grown. Love to see it again in a few years.
Great stuff
Qualicum Brian
It’s just Rocky Mountain juniper foliage, no grafting-
Reblogged this on DangerousBry's Blog and commented:
Fantastic work guys… Material … Spot on 😉
Ah… well…we’ll see if it is fantastic after another couple of days! Naturally, any adventure of this sort involves slow downs like trips to Ace Hardware to get worn out grinder bits and the like. I’d just prefer life to stop when doing this sort of thing. Sadly, it doesn’t! We actually do need to eat lunch eventually.
What an awesome piece of material Michael! I’ve seen this technique of boxing the top in now here and at Ryans. Doesn’t the substrate stay wet too long not being exposed to the sun and wind?
It can cause problems if you don’t get holes in the box. I’ll have a screen on the top side for easy watering, and I’ll be putting holes around the box, too, for good aeration.
I am a little late to this party, vacation so just now catching up on the blog. WOW, so cool how you built the box around the tree. As Chris expressed, I wondered about drainage. Ah yes, More Holes will be the ticket needed. Beautiful work. Thanks Michael for the photos. Pictures worth a zillion words.
Box will be like swiss cheese when we’re done with it…